Running MicroPython on the ESP32-C3 Super Mini
I had my first experiences programming a microcontroller when I completed the course work for my high school computer engineering class a few weeks early. Instead of allowing me to sit idle, my teacher handed me a PicKit 1 flash starter kit to play with. That development kit contained a PIC12F675 with a mere 64 bytes of RAM, one working register, and had to be programmed in assembly as the C compiler was not included in the kit. Learning assembly and getting an LED to blink under program control was a fantastic first experience, but microcontroller platforms have taken great strides since the days of being exclusively programmed in C or assembly.

The ESP32-C3 has a 160MHz RISC-V core that is about as fast as a 166MHz Pentium MMX, has 400KB of SRAM, has integrated Bluetooth LE, WiFi 5, and a host of other I/O capabilities. High performance microcontrollers are now commonplace, but what is surprising, is the low cost of these ESP32 devices. I purchased five such ESP32-C3 development boards for a mere $12.50 CAD, shipping included. That’s $2.50 per development board, which is incredibly cheap given the capabilities of this device.
Years ago, I would have balked at the idea of running Python on a microcontroller and would have probably insisted on developing in C. However, on modern platforms, running Python is not only possible, but the performance of Python is more than adequate for many applications.
MicroPython is an interpreted language, which will introduce some performance overhead, but Python offers some significant advantages over C that should not be overlooked: Reduced development time, intrinsic memory safety, built-in package management and better code portability.
Prerequisites
This tutorial will assume you are running Ubuntu, but these instructions will also probably work for any Debian based distribution. It may be possible to follow this tutorial on Ubuntu on Windows via WSL2, but I have not tested this.
I will also assume that you know how to use the shell, are able to navigate the filesystem., and understand how to install Ubuntu packages with apt.
Firmware Installation
In order to get started, we first need to install the MicroPython firmware on our ESP32, which includes the interpreter and the built-in libraries. This requires a tool for uploading the firmware to the board, ESPtool:
$ sudo apt install esptool
Download the latest firmware from The MicroPython project and then navigate to the directory it is in.
Next, we need to determine which port the ESP32 is connected to. The best way to do this is to disconnect all other development boards from your system and look in /dev for a ttyACM device:
$ ls /dev/ttyACM*
If you only see one result in the list, then that is probably the port your ESP32 is connected to:

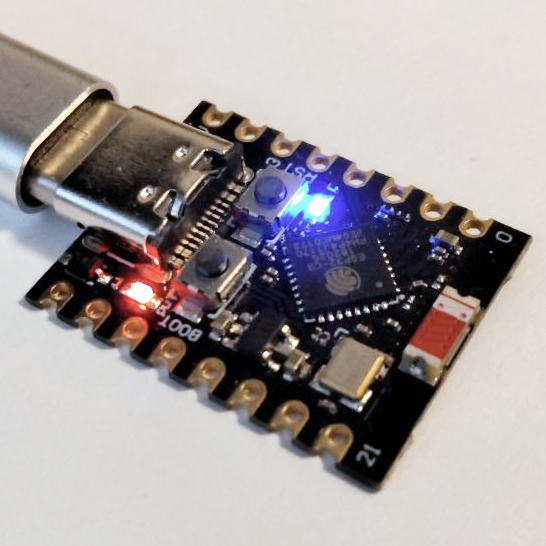
Now that we know what port the ESP32 is connected to, it’s time to flash the firmware. To do this, the ESP32 needs to be put into bootloader mode. Press and hold the BOOT button on the board. While continuing to press the boot button, press, then release the reset button and continue to hold the BOOT button for a few seconds. This procedure puts the ESP32 into a special mode that allows us to upload the MicroPython firmware.
To install MicroPython on the device, run the following two commands:
$ esptool --port /dev/ttyACMx erase_flash
$ esptool --port /dev/ttyACMx write_flash 0 ESP32_GENERIC_C3-xxx-vx.y.z.bin
Where /dev/ttyACMx is the port that your ESP32 board is connected to and ESP32_GENERIC_C3_xxx is the name of the firmware file you downloaded earlier. The first command erases the program memory on the ESP32 and the second writes the firmware image to memory.
If you want to be absolutely sure you are running these commands on the correct device, you can disconnect all other development boards and USB to serial adaptors from your computer.
Testing the MicroPython environment
To test the MicroPython environment, we need a serial terminal emulator. I choose to use screen for this, but there are many alternatives.
$ screen /dev/ttyACMx 115200
Again, replace /dev/ttyACMx with the port that your board uses. If you do not have screen installed, you can install it with sudo apt install screen.
If all went well, we should now be greeted by a Python shell prompt (you may need to hit enter to see it):
>>>
Try running the help() command:
>>> help()
You should see output similar to the following:

If you do, your board is ready to run Python code!
You can exit screen by pressing CTRL-A to put screen into command mode and then pressing K to end the session.
Uploading Python files
The Python environment we just installed isn’t useful without the ability to run scripts. To upload code to the board, we will need another tool. There are a couple of options to do this, I will introduce them both and I would suggest reading about both of them before choosing one to install.
AMPY (Adafruit MicroPYthon tool)
AMPY can upload Python files to the board, manage the filesystem on the board and carry out basic functions such as resetting the board. On recent versions of Ubuntu, the official Adafruit installation instructions may fail as Python packages are managed by apt, the package manager used by Ubuntu. To work around this, we will install AMPY in a Python virtual environment.
Navigate to your project directory (or make a new directory for your project) and run the following commands in that directory:
$ sudo apt install python3-pip python3-pipenv
$ pipenv shell
$ pip3 install adafruit-ampy
This creates a virtual python environment for us to use for development, without impacting any of the packages installed by the system package manager. This is important because many Linux distributions are highly dependent on their Python installations to run scripts that control important parts of the operating system. Installing Python packages directly in the global scope has the potential to cause serious problems.
Now whenever we want to use ampy, we can navigate to the project directory and activate the pipenv shell for the virtual environment we just created:
$ pipenv shell
Whenever you wish to exit the virtual environment, you can do so by pressing CTRL+D or using the exit command
Testing AMPY by uploading a script
Paste the following into the text editor of your choice and save it as “main.py” in the project directory:
from machine import Pin
p8 = Pin(8, OUT)
while True:
	time.sleep(1)
	p8(1)
	time.sleep(1)
	p8(0)
Upload the file we just created and execute it:
$ ampy -p /dev/ttyACMx put main.py
$ ampy -p /dev/ttyACMx run main.py
If all went well, the on board LED should be blinking and you should be ready to start coding!
Installing MPRemote
mpremote is my preferred tool for interacting with a device running MicroPython. It has much of the same functionality as ampy, but introduces some additional powerful features such as installing Python packages using the built-in package manager (mip) and mounting a local file system folder on the MicroPython device.
Installation is much the same procedure as installying ampy. Make sure to activate your pipenv shell (See the ampy installation instructions above) and install mpremote using pip:
$ pip3 install mpremote
You could also install mpremote using Ubuntu’s package manager (apt install micropython-mpremote), but the version available via pip will likely be much more up to date.
Much like ampy, mpremote can perform basic filesystem operations such as copying and deleting files. These operations are performed using the mpremote fs command. You can see a full list of the available filesystem functions by running mpremote fs --help
MicroPython packages can be installed on the device through mpremote using the mpremote mip command. This is particularly useful on boards that do not have networking capability as the host computer the board is connected to can fetch package files over the internet and then handle installing the package on the device.
What sets mpremote apart is the ability to mount a local directory in order to run code on the connected device directly out of directory on your development machine. This powerful feature enables rapid in-place testing without the need to copy files. Mounting a local directory is done using the mpremote mount command. Once mounted, all the files in the current directory will be available on the MicroPython device and you’ll be given a Python REPL on the device with which to run your code. This not only avoids the need to write scripts to copy files, but also allows you to interact directly with the Python interpreter running on the device during development.
Conclusion
I was skeptical about running Python on a microcontroller and admittedly viewed it as a bit of a toy exclusively for hobbyist use, but I’ve been thoroughly impressed by the platform. The available development tools are better than a lot of the tools available other, more proprietary platforms and the ability to leverage the vast ecosystem of Python libraries in a project is a massive advantage that can save a lot of development time.
I will be exploring some of the more advanced functionality such as interacting with the Bluetooth hardware and running a web server on the device in future blog posts.