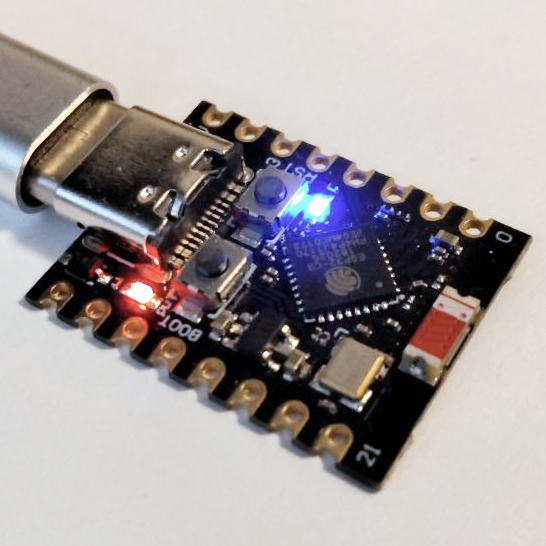
Bluetooth in MicroPython on the ESP32-C3 Super Mini
In my previous post, I discussed getting MicroPython installed on the ESP32 and provided some sample code to make the on-board LED blink. In this post, we’ll be diving into something much more advanced: using with the Bluetooth hardware on the ESP32-C3.
Since this is a post about Python, I’ll assume that you are familiar with Python and already have MicroPython running on your ESP32. I will assume that you are familiar with asynchronous programming in Python, as we will be working with highly asynchronous code written using the async/await syntax.
Introduction
If you already have experience developing Bluetooth applications in C or C++, you may have begun to picture a nightmarish mess of call back functions and mutexes, but fear not! Writing Bluetooth applications in MicroPython is a completely different experience thanks to the aioble module.
The “aio” in “aioble” stands for “asyncio,” which as you may have surmised, means that this library allows us to use asynchronous coroutines instead of callbacks. This tends to result in code that is far more readable and maintainable than code that relies upon call back functions.
In this tutorial, we will write a small program that can be used to scan for, connect to and list all of the services available on a Bluetooth device. It should serve as a good introduction to using the ESP32 as a Bluetooth Low Energy client.
Getting Started
I’ll assume that you have MicroPython installed on your ESP32-C3 and mpremote installed on your computer. If not, have a look at my last tutorial for instructions on how to do that.
Before we can begin writing code to make use of the Bluetooth peripheral on the ESP32, we need to install the aioble module. In standard versions of Python, we would use a package manager such as pip to do this. However, as pip isn’t available on MicroPython, we will use the package management tool built into MicroPython, mip.
mip is capable of running directly on the board and retrieving Python packages over the internet, but not every board has or is capable of having an internet connection. To address this, the developers of mpremote have made it possible to have mpremote retrieve packages over the internet on behalf of the development board via the mpremote mip command. We will be installing aioble using mpremote mip.
Navigate to the directory you in which you installed installed mpremote in the last tutorial and activate the pipenv shell if you have not already done so.
$ pipenv shell
$ mpremote mip install aioble
mpremote should automatically detect the serial port that your board is connected to and install the package that provides the aioble module.

If mpremote complains about not being able to find the device, make sure it is connected to your computer.
Scanning for Devices
Begin by creating a new Python file, “main.py,” and pasting the following into it:
import aioble
import asyncio

async def scan():
    devices = []
    async with aioble.scan(duration_ms=5000) as scanner:
        async for result in scanner:
            devices.append(result)
    return devices

def printDeviceList(devices):
	for i, device in enumerate(devices):
		print (i + 1, device, device.name())

async def loop():
    while True:
        print ("Scanning for discoverable devices...")
        devices = await scan()
        printDeviceList(devices)
        input("(Press ENTER to scan again)")


asyncio.run(loop())
The scan() function in the code above scans for nearby Bluetooth devices for five seconds and then returns a list of devices. The aioble.scan() call puts the device in scan mode and the async with ... as scanner statement creates an asynchronous generator that allows us to append each result to a list.
The printDeviceList() function uses the enumerate() builtin function to print a numbered list of devices to the console.
The loop() function simply calls each of these functions in an infinite loop, pausing for user input after each iteration.
To run this code, mount the directory that your created the file in using the mpremote mount command:
$ mpremote mount .
This should give you a Python REPL shell on the device:

To run the code, import the module we just created with import main:

The code should execute and immediately begin scanning. If there are nearby devices that are currently discoverable, they should appear in the list:

Connecting to a Device
Next, we need to handle connecting to a device. We would want to be able to choose to either select a device out of the list of devices, or scan again in case the device we are looking for isn’t detected. To implement this functionality, we will move the logic from our loop() function to a new function, scanLoop() and modify it as follows:
async def scanLoop():
    while True:
        print ("Scanning for discoverable devices...")
        devices = await scan()
        printDeviceList(devices)
        print("Select a number, or press enter to scan again")
        strSelection = input("> ")
        try:
                selection = int(strSelection)
                if selection >= 0 and selection <= len (devices):
                    return devices[selection - 1].device
        except ValueError:
                #Just scan again if we are unable to convert the selection
                pass
As you can see, we’ve changed the input() statement to include a prompt and added some logic to convert the input to an integer, check if the selection is valid and then return the appropriate device.
Next, we will create a new loop() function that will handle the connection logic:
async def loop():
    while True:
        device = await scanLoop()
        try:
            connection =  await device.connect(timeout_ms = 10000)
            print ("Connected.")
        except Exception as e:
            print("Connection failed")
            print(str(e))
It may take a few attempts at scanning to see your device in the list, but selecting the device should result in a successful connection to it. If your Bluetooth device is not appearing in the list, you may need to put it in pairing mode.

Obtaining Device Information
Here’s where things start to get interesting: listing all of the available services and attributes on on the device. Bluetooth Low Energy devices provide services which each have endpoints called Generic ATTributes (GATT). Each service can have multiple associated GATT attributes and these attributes may be readable, writable or both.
Listing the services and attributes offered by a device is often the first step in determining how to to interact with it, so we will finish this tutorial by doing exactly that.
Add the following function to the code:
async def printDeviceInfo(connection):
    services = []
    async for service in connection.services():
        services += [service]
    for service in services:
        print(service)
        async for characteristic in service.characteristics():
            print('\t' + str(characteristic))
This code accepts a connection to a bluetooth device (like the once we made earlier) and iterates through the services advertised by the device, listing the GATT attributes of each service as it does so.
Now all that’s needed is to modify the loop() function to call printDeviceInfo() on the connection object.
async def loop():
    while True:
        device = await scanLoop()
        try:
            connection =  await device.connect(timeout_ms = 10000)
            print ("Connected.")
            await printDeviceInfo(connection)
        except Exception as e:
            print("Connection failed")
            print(str(e))
If all went well, when you connect to a Bluetooth device, you should see output similar to the following:

Services are identified by UUIDs (Universal Unique Identifiers) assigned by Bluetooth SIG. The usage and meaning of each attribute is defined by the type of service.
Conclusion
At this point, your code should look like this:
import aioble
import asyncio

async def scan():
    devices = []
    async with aioble.scan(duration_ms=5000) as scanner:
        async for result in scanner:
            devices.append(result)
    return devices

def printDeviceList(devices):
	for i, device in enumerate(devices):
		print (i + 1, device, device.name())


async def scanLoop():
    while True:
        print ("Scanning for discoverable devices...")
        devices = await scan()
        printDeviceList(devices)
        print("Select a number, or press enter to scan again")
        strSelection = input("> ")
        try:
                selection = int(strSelection)
                if selection >= 0 and selection <= len (devices):
                    return devices[selection - 1].device
        except ValueError:
                #Just scan again if we are unable to convert the selection
                pass

async def printDeviceInfo(connection):
    #Prints GATT service information about a connected device
    services = []
    async for service in connection.services():
        services += [service]
    for service in services:
        print(service)
        async for characteristic in service.characteristics():
            print('\t' + str(characteristic))

async def loop():
    while True:
        device = await scanLoop()
        try:
            connection =  await device.connect(timeout_ms = 10000)
            print ("Connected.")
            await printDeviceInfo(connection)
        except asyncio.TimeoutError:
            print("Connection failed: Timed out.")

asyncio.run(loop())
Despite being a mere 50 lines of code, this program handles scanning for, connecting to and listing the services available on a device with an easy to use text-based interface. It does this without the ugly callback functions or concerns over synchronization that would be required in a C++ implementation. If you want to extend the functionality of this program further, I’d suggest having a look at the aioble documentation.